
MS Word Merging Data Rows into a Single Table
Merging Data into a single rowset in an MS Word document
This article describes how to use VBA to connect to a query in MS Access and pull the data rows into a formatted table in MS Word. The Word document will include inserted, formatted text above the table and within the table. This article will cover the basic import of a single dataset into Word as preparation for the next article which covers how to add a computed Totals Row to the Table automatically and will also add a second data set into the same Word document in a separate formatted table on the following page.
Using VBA instead of Mail Merge for Data Rows
A quick note about Mail Merge in Word - while it is possible to get a single data set into Word by using the Directory feature in Mail Merge and have it appear as a table, there are a couple of differences which make using VBA a nice option to use.
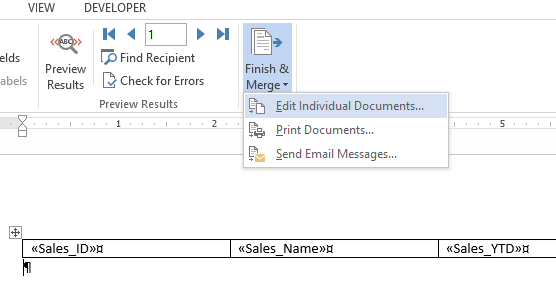
To begin with a Directory, you would start in the Mailings Ribbon, Start Mail Merge, and select Directory.

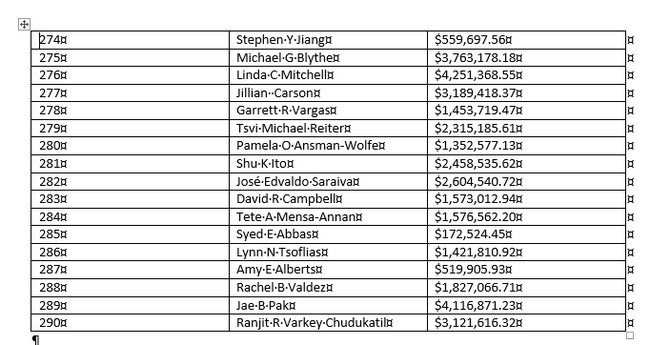
If you create a table at the very top of the Word document, and Insert the Mail Merge fields into the table and click on Finish & Merge \ Edit Individual Documents, you will get a table that does not have any headers, but still looks nice in Word.

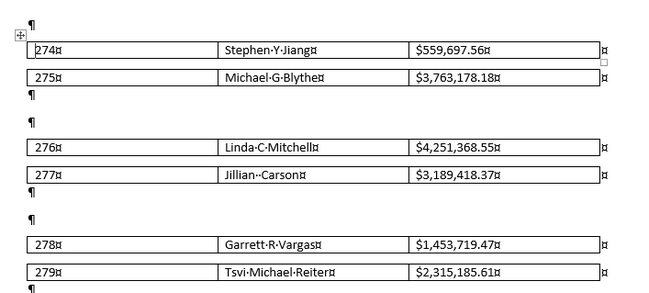
However, if you put the table in the Word document below the very top of the Word document and Merge, the resulting table does not look as nice.
Merging Data Rows into a Single Table in Word
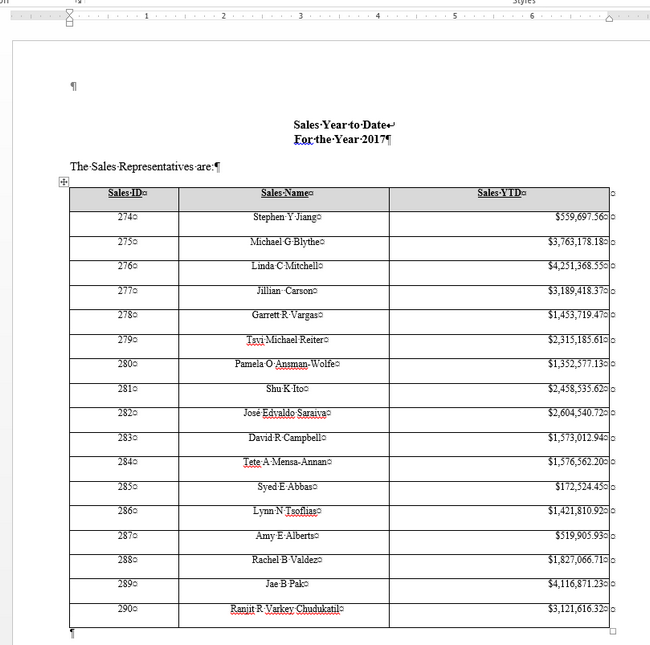
The table below was created in a Word document (.docm extension) and used VBA to automatically connect to an MS Access query and then inserts Bold Font header text followed by a stand alone sentence and then followed by a formatted table with shaded header with formatted data populated into it.

Creating the Data Source for the Word Table
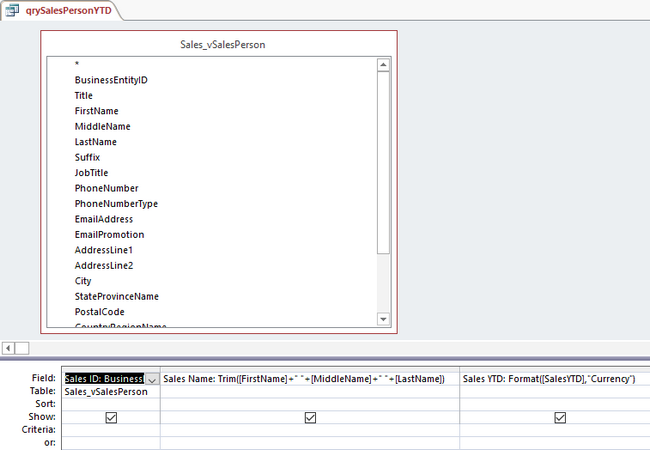
First, start off with a query in MS Access. The table used in this example is from the SQL Server AdventureWorks database (actually a Linked Table - View) named vSalesPerson. Any table created in Access with some data could also be used. The code will be using a Table of 3 columns to display the results.
Adding VBA to a Word Document
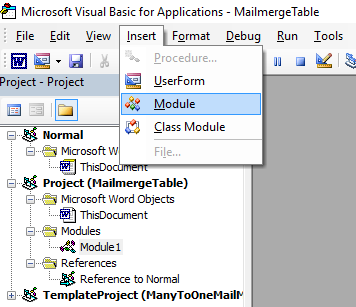
To create code in a Word document, Open Word and click ALT + F11. From here, you can insert a new Module to create the VBA code.
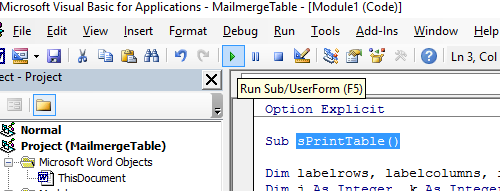
Start by naming a Sub procedure (this one is named sPrintTable) and write the code to name the fields for the rows and columns of the table and the ADODB recordset & connections to connect to the data source in MS Access. Be sure to go to Tools \ References to add the Microsoft ActiveX Data Objects 2.8 Library to the Project or you will generate an Error when attempting to run the code.
Sub sPrintTable()
Dim labelrows, labelcolumns, i As Integer
Dim j As Integer, k As Integer, t As Integer
Dim rsRows As Integer
Dim rs As ADODB.Recordset, rsCount As ADODB.Recordset
Dim cn As ADODB.Connection
Dim sqlGetTbl As String
Dim sDataSource As String, sDataTable As String
Dim sProvider As String
Set cn = New ADODB.Connection
Set rs = New ADODB.Recordset
Set rsCount = New ADODB.Recordset
Next, set the values for the Data Source and Table (the Query in this case) as well as the Provider to connect to and retrieve data.
sDataSource = "C:\MS Access\Database3.accdb"
sDataTable = "qrySalesPersonYTD"
sProvider = "Microsoft.ACE.OLEDB.12.0;"
sDataSource = "'" & sDataSource & "'"
Set and Open the ADODB Connection in code. Then set and open each Recordset (one for the Row Count in the Table and one for the Row Content).
cn.Provider = sProvider
cn.ConnectionString = "Data Source=" & sDataSource
cn.Open
sqlGetTbl = "SELECT COUNT([Sales ID]) FROM " & sDataTable
rsCount.Open sqlGetTbl, cn, adOpenDynamic, adLockOptimistic
sqlGetTbl = "SELECT * FROM " & sDataTable
rs.Open sqlGetTbl, cn, adOpenDynamic, adLockOptimistic
Word VBA Page Formatting
The next set of code sets the number of rows to the count returned from the rsCount recordset and the number of columns to 3 for the table. It also sets the margins and then selects all content in the existing Word document and then Deletes it (see the highlighted code lines below). The code then sets the Font to Bold, Times New Roman and types the first lines of formatted Text into the document.
labelrows = rsCount.Fields(0)
labelcolumns = 3
If Len(labelcolumns) > 0 And Len(labelrows) > 0 Then
ActiveDocument.PageSetup.HeaderDistance = InchesToPoints(0.5)
ActiveDocument.PageSetup.FooterDistance = InchesToPoints(0.5)
ActiveDocument.PageSetup.LeftMargin = InchesToPoints(0.75)
ActiveDocument.PageSetup.RightMargin = InchesToPoints(0.75)
Selection.WholeStory
Selection.Delete
Selection.Font.Bold = True
Selection.Font.Name = "Times New Roman"
Selection.TypeText Text:="Sales Year to Date"
Selection.TypeText Text:=Chr(11) & "For the Year 2017"
Selection.ParagraphFormat.Alignment = wdAlignParagraphCenter
Selection.ParagraphFormat.LineUnitAfter = 1
Selection.Font.Bold = False
Selection.TypeText Text:=vbCr & "The Sales Representatives are:"
Selection.ParagraphFormat.Alignment = wdAlignParagraphLeft
Selection.ParagraphFormat.LineUnitAfter = 1
Selection.TypeParagraph
Selection.Font.Name = "Times New Roman"
Selection.Font.Size = "9"
Selection.ParagraphFormat.Alignment = wdAlignParagraphLeft
Selection.Font.Bold = False
The next set of code creates the table and sizes the columns and adds the borders to it. Note that the NumRows in ActiveDocument.Tables.Add is "labelrows + 1" - this is to add 1 additional row as the Header in the table which will be populated with the Field Names from the MS Access query data source.
t = 0
t = t + 1
If Not rs.EOF Then
ActiveDocument.Tables.Add Range:=Selection.Range, NumRows:=labelrows + 1, NumColumns:= _
labelcolumns, DefaultTableBehavior:=wdWord9TableBehavior, AutoFitBehavior:= _
wdAutoFitFixed
ActiveDocument.Tables(t).Columns.PreferredWidth = InchesToPoints(5)
ActiveDocument.Tables(t).Columns(2).PreferredWidth = InchesToPoints(10)
ActiveDocument.Tables(t).Columns(3).PreferredWidth = InchesToPoints(10)
ActiveDocument.Tables(t).Rows.Height = InchesToPoints(0.3)
ActiveDocument.Tables(t).Borders(wdBorderLeft).Visible = True
ActiveDocument.Tables(t).Borders(wdBorderRight).Visible = True
ActiveDocument.Tables(t).Borders(wdBorderTop).Visible = True
ActiveDocument.Tables(t).Borders(wdBorderBottom).Visible = True
ActiveDocument.Tables(t).Borders(wdBorderHorizontal).Visible = True
ActiveDocument.Tables(t).Borders(wdBorderVertical).Visible = True
End If
i = 1
j = 1
The code below will iterate through the data rows and fill the newly created table with the recordset data from the ADODB recordsource named rs. Note that when the row count is 1 (when j = 1) that there is additional code to populate the Field names in the Header Row. Also note that the rs.Fields use an array with a Zero start value so the columns are the value of k - 1.
If Not rs.EOF And Not IsNull(rs.Fields(1)) Then
For j = 1 To labelrows
For k = 1 To labelcolumns
If j = 1 Then
ActiveDocument.Tables(t).Cell(j, k).Range.InsertBefore rs.Fields(k - 1).Name
ActiveDocument.Tables(t).Cell(j, k).Range.Shading.BackgroundPatternColor = wdColorGray15
ActiveDocument.Tables(t).Cell(j, k).Range.ParagraphFormat.Alignment = wdAlignParagraphCenter
ActiveDocument.Tables(t).Cell(j + 1, k).Range.InsertBefore rs.Fields(k - 1)
Selection.EndOf Unit:=wdParagraph, Extend:=wdExtend
Selection.Range.Font.Bold = True
Selection.Range.Font.Underline = wdUnderlineSingle
Else
If Len(Trim(rs.Fields(k - 1))) > 0 Then
ActiveDocument.Tables(t).Cell(j + 1, k).Range.InsertBefore rs.Fields(k - 1)
End If
End If
'This Select statement provides conditional formatting for the columns:
'Columns 1 and 2 are Center Aligned, Column 3 is Right Aligned.
Select Case k
Case 3:
ActiveDocument.Tables(t).Cell(j + 1, k).Range.ParagraphFormat.Alignment = wdAlignParagraphRight
Case 1, 2:
ActiveDocument.Tables(t).Cell(j + 1, k).Range.ParagraphFormat.Alignment= wdAlignParagraphCenter
End Select
Next k
rs.MoveNext
Next j
End If
If Not rs.EOF Then
rsRows = ActiveDocument.Paragraphs.Count
Selection.Move Unit:=wdParagraph, Count:=rsRows
Selection.InsertBreak Type:=wdPageBreak
End If
rs.Close
cn.Close
Selection.MoveDown Unit:=wdLine, Count:=labelrows + 2
Selection.TypeParagraph
End If
End Sub
Running the VBA Code to Import the Data Rows into Word
In the Visual Basic window in Word, you can highlight the Sub and press F5 or click on the Green Arrow in the toolbar to run it. Once it is done, you will have a perfectly formatted Word document with Rows of Data.
The code for this project as a Text File is located here: mailMerge.txt. Be sure to add it to a Word document saved as a .DOCM file (Word Marco-Enabled Document). Happy Coding!