Creating Comics
Assignment: Students use common graphic editor tools such as layers, magic wand, drawing tools, text tool, and the paint bucket to create their own comics. This is an excellent lesson to discuss various image types such as .jpg .gif and .png. Of particular interest in this lesson are the transparency features in .gif and .png files. Students learn that they can delete the background of a .gif or .png image and make it transparent.
In this assignment students build their own comic knock knock joke with Paint.NET. First, students add a background image then add some characters. Next, students add some speech bubbles and text. Find jokes for the comics on the internet. The free graphics program used here is Paint.NET.
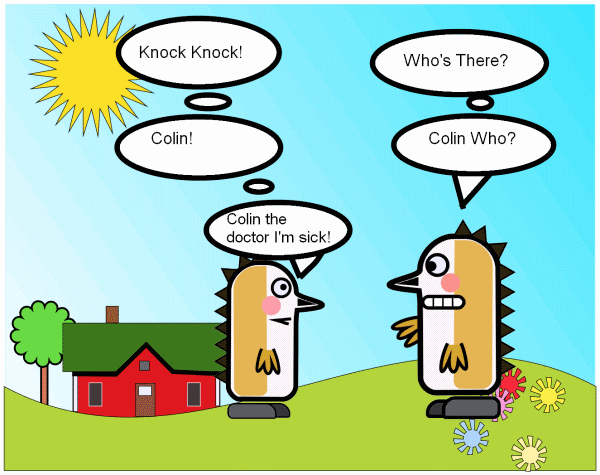
Finished Example
Download: comic backgrounds and characters for this assignment.
Step One:
- Download the comic backgrounds and characters and make the cartoons available to the students on a shared folder or a photo gallery.
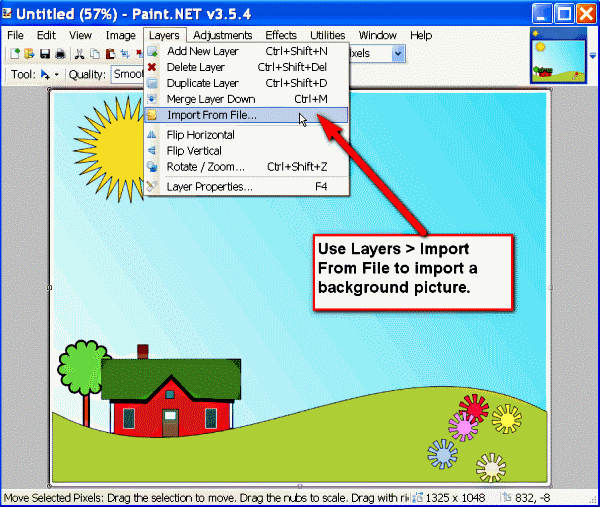
- Import a background. Layers > import.
Step Two
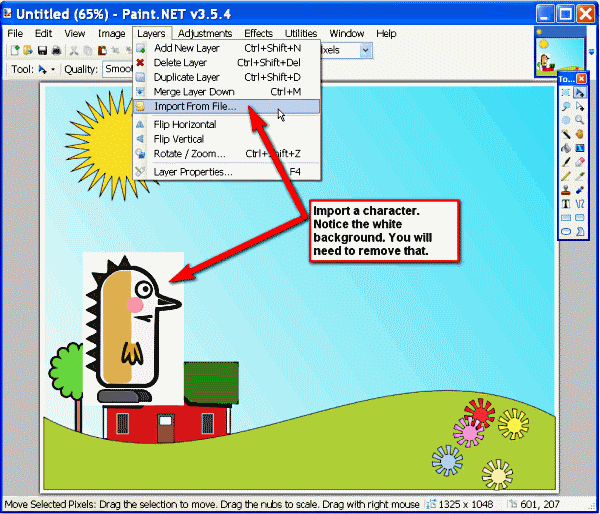
Import the first character. Your character may have a background that needs to be removed.
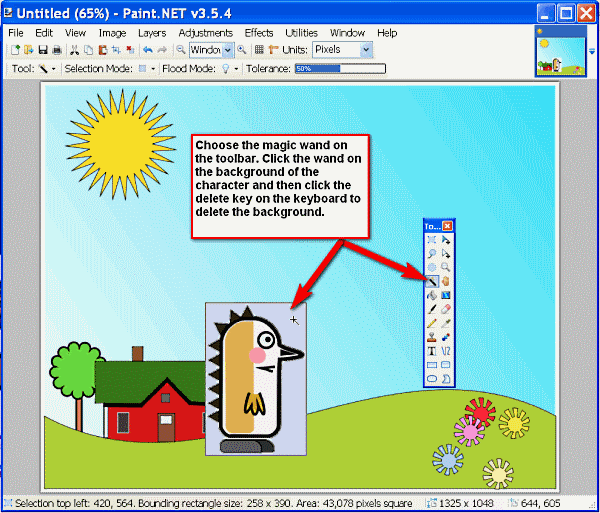
Step Three
Choose the magic wand on the toolbar and click on the background of the character. Click delete on the keyboard to remove the background.
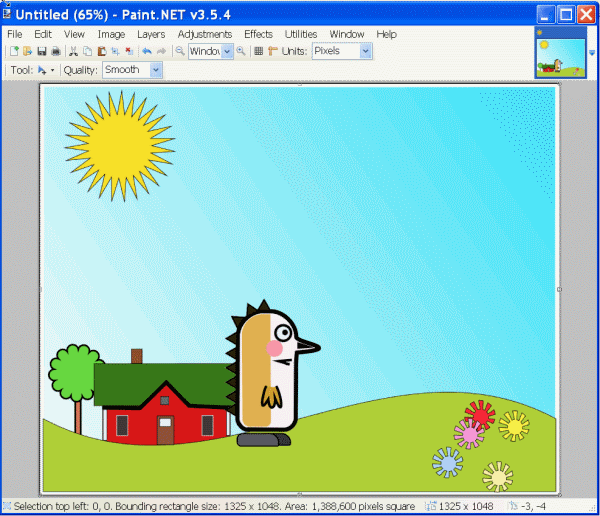
Here is the result after deleting the background.
Step Four
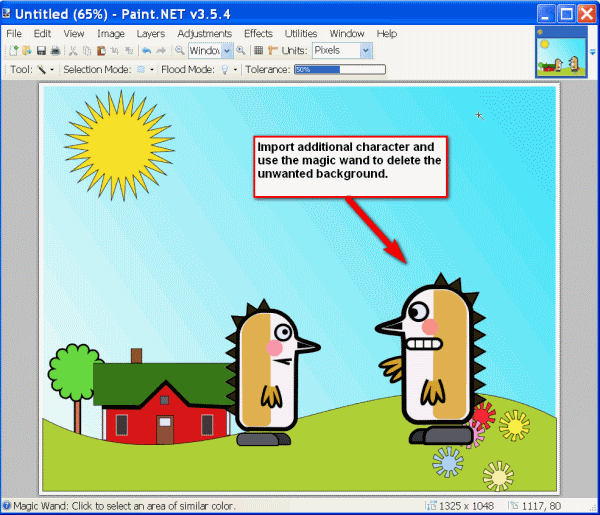
Import an additional character and use the magic wand to delete the background if necessary.
Step Five
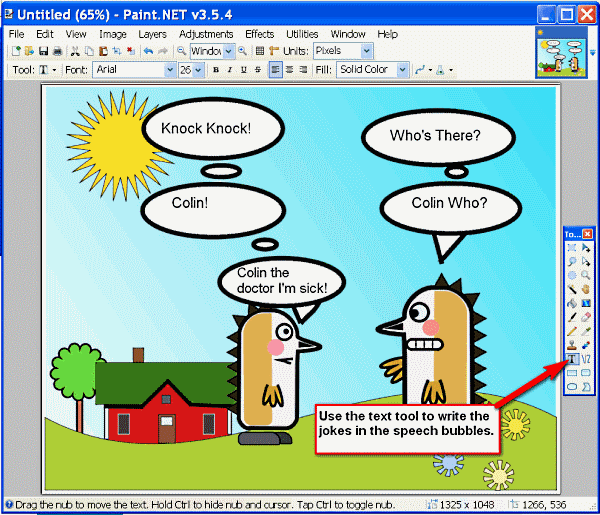
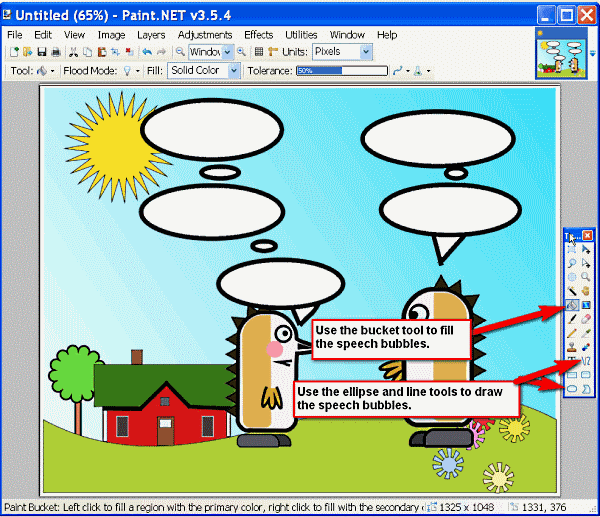
Use the ellipse and line tools to create speech bubbles. Fill the speech bubbles with the bucket tool.
Step Six
Use the text tool to add text to the speech bubbles. Add your name on the bottom corner of the picture.